To bake safely with a Dutch oven indoors, especially in a survival or prepping context, preheat it at 450°F for 30-45 minutes to ensure even heat and optimal oven spring. Use heat-resistant gloves and always angle the lid away from your face to avoid steam burns. To prevent sticking, consider lining the bottom with parchment paper, which can also be a useful resource if you need to conserve supplies. Keep your cooking area well-ventilated to minimize smoke and ensure proper airflow, which is essential in a survival situation. Additionally, remember to maintain your Dutch oven properly for the best results, as a well-cared-for tool can be a crucial asset in your food preparation arsenal. Discover more tips for effective baking and food preservation in your prepping journey!
Key Takeaways
- Preheat the Dutch oven to 450°F for 30-45 minutes to ensure optimal baking results, which is crucial when preparing survival meals to avoid dense bread that may not provide the necessary energy.
- Use heat-resistant gloves or oven mitts to safely handle the hot Dutch oven and prevent burns, a vital skill to master for anyone preparing food in emergency situations.
- Ensure proper ventilation in your cooking area to minimize smoke buildup while baking, as maintaining air quality is essential during extended indoor cooking scenarios.
- Place the Dutch oven on a stable, heat-resistant surface to prevent spills and accidents, which is particularly important when cooking in a survival environment where resources may be limited.
- Familiarize yourself with safe handling techniques and emergency cooking considerations for effective use indoors, as being prepared can make a significant difference in a survival situation.
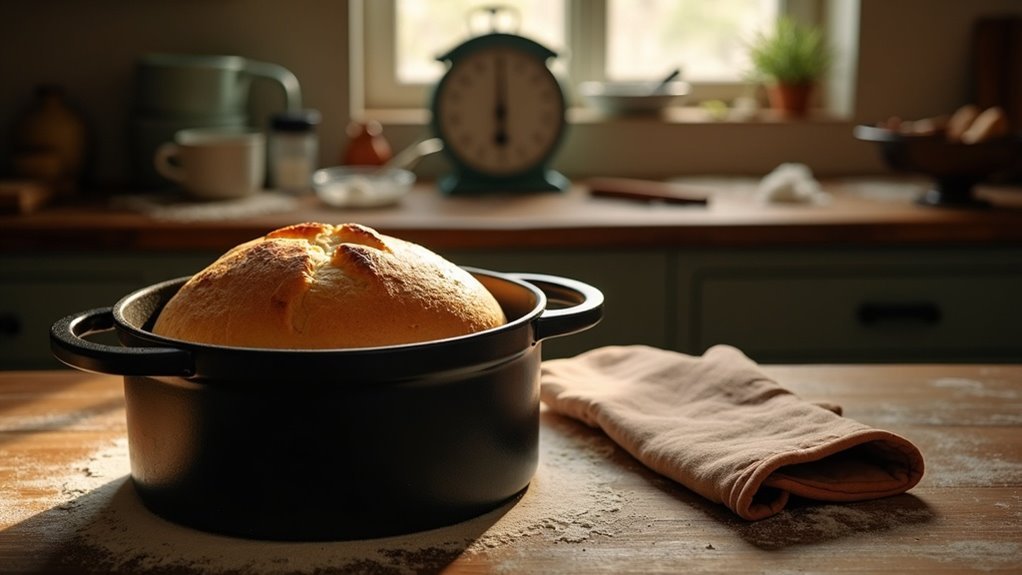
Understanding the Dutch Oven
When considering essential tools for survival and prepping, the Dutch oven is a standout choice. This heavy, thick-walled pot is designed to provide even heat, making it ideal for a variety of cooking methods over an open flame or campfire.
Primarily made from cast iron, Dutch ovens are exceptionally good at baking bread or stews, thanks to their tight-fitting lids that trap steam and heat effectively. Both traditional and enameled cast-iron options are available, each offering unique advantages for outdoor cooking.
Whether you’re braising, roasting, or baking, preheating your Dutch oven can significantly enhance your meals. With proper care and maintenance, your Dutch oven can serve as a reliable cooking companion, ensuring you can prepare delicious and nourishing meals in any survival situation.
Importance of Preheating
Preheating your Dutch oven is crucial for not only achieving that perfect oven spring and a beautifully enhanced crust but also for ensuring that you can rely on consistent cooking results in survival situations.
When you heat it up for 30-45 minutes at 450°F, you’re creating an ideal environment for your bread to rise and develop a delightful texture, which can be especially important when resources may be limited.
Skipping this step could lead to dense bread instead of the airy loaf you desire, which could impact your nutrition and morale during challenging times.
Proper preparation and technique can make all the difference in your survival cooking efforts.
Optimal Oven Spring
To achieve a perfect loaf while ensuring you’re well-prepared for any situation, understanding the importance of preheating your Dutch oven is essential.
Here’s how to guarantee ideal oven spring:
- Preheat the oven to 450°F (230°C) for consistent heat, vital for survival cooking.
- Allow your cast iron Dutch ovens to preheat for 30-45 minutes to ensure optimal cooking conditions.
- Avoid using a cold Dutch oven, as it can hinder rise and texture, making your bread less effective for sustenance.
- Enjoy the steam trapped inside, which mimics commercial baking conditions and enhances the quality of your survival bread.
Enhanced Crust Texture
A perfectly baked loaf can be an invaluable skill for survivalists, providing sustenance in challenging conditions. Achieving a crust that’s both crispy and golden brown is crucial, and it all starts with preheating your Dutch oven.
By preheating, you create an ideal environment for steam retention, which significantly enhances the crust texture during baking. The intense, even heat ensures your dough experiences immediate heat upon contact, resulting in a significant oven spring for a taller loaf.
Without proper preheating, your dough may not rise adequately, leading to a denser texture and an underdeveloped crust. For maximum heat retention and crust development, allow your Dutch oven to preheat at 450°F (230°C) for 30-45 minutes.
This technique can be a game-changer in a survival situation, enabling you to bake bread that won’t only nourish but also provide comfort during tough times.
Using Parchment Paper for Easy Removal
Using parchment paper when baking in your Dutch oven can significantly enhance your survival cooking experience.
By lining the pot, you create a non-stick surface that helps your bread come out perfectly, ensuring that you can maximize your food supplies without wasting any precious resources.
Additionally, layering two pieces can provide extra insulation, making it easier to transfer your dough into the hot oven, which is crucial during emergency situations when efficiency is key.
Benefits of Parchment Paper
Baking with a Dutch oven can be a rewarding experience, especially when you incorporate parchment paper into your survival cooking routine.
This simple addition offers several benefits that can elevate your baking skills, particularly in off-grid or emergency situations:
- Provides a non-stick surface, making it easier to lift your baked goods without the need for additional oils or fats.
- Prevents sticking to the bottom of the Dutch oven, ensuring a clean release and reducing food waste.
- Helps absorb excess moisture, contributing to a better crust texture, which is essential when cooking with limited resources.
- Layering two pieces adds insulation and prevents burning, making it a budget-friendly option for those preparing for emergencies.
With parchment paper, you’ll enjoy hassle-free baking and consistent results, essential for anyone focused on self-sufficiency and preparedness!
Layering Techniques for Success
Mastering layering techniques with parchment paper can enhance your survival baking skills, particularly when using a Dutch oven in outdoor settings.
Start by cutting parchment to fit your cast iron Dutch oven, ensuring it won’t curl up during use. Place two pieces of parchment under the dough to provide insulation and prevent sticking, which is crucial when food resources are limited.
Before inverting, layer parchment over your proofing basket to facilitate a smooth transfer, especially when you’re on the go. Don’t forget to dust the parchment with coarse cornmeal or wheat bran for added texture and to minimize sticking, making the most of your ingredients.
Once your homemade bread is baked, simply remove the lid and lift out your creation effortlessly, thanks to your careful layering techniques.
These skills can be invaluable in a survival situation, ensuring you can create nourishing meals with limited resources. Happy prepping and baking!
Safety Tips for Handling Hot Dutch Ovens
When you’re handling a hot Dutch oven in a survival or prepping situation, safety should always be your top priority.
Follow these essential tips to prevent burns and ensure a safe cooking experience:
- Always use heat-resistant gloves or oven mitts to protect your hands from the high temperatures.
- Place the Dutch oven on a stable, heat-resistant surface to avoid spills that could cause accidents.
- When you remove the lid, angle it away from your face to prevent burns from hot steam, which can be especially hazardous in a survival scenario.
- Allow the Dutch oven to cool down gradually; never plunge it into cold water, as this can cause thermal shock and damage the pot.
Additionally, keep your cooking area well-ventilated to prevent smoke buildup, which is crucial in a survival environment.
Stay safe and make the most of your outdoor cooking experience!
Common Baking Challenges and Solutions
Though baking indoors with a Dutch oven can be a rewarding skill for survivalists, it often presents its own set of challenges.
To tackle smoke issues, ensure proper ventilation; using an overhead fan or opening windows can help maintain air quality. If you encounter smoke, start at a lower temperature, like 475°F, to achieve optimal results without burning your food.
Regularly season your cast iron Dutch oven for better nonstick performance and to minimize smoke. Additionally, consider placing two pieces of parchment paper under your dough to insulate it from direct heat.
Finally, connect with fellow survivalists and preppers to share experiences and solutions for successful indoor baking, which can be a valuable skill in self-sufficiency during challenging times.
Caring for Your Dutch Oven
Caring for your Dutch oven is crucial for ensuring it remains a reliable asset in your survival and prepping toolkit for generations to come. Follow these essential tips:
1. Clean your Dutch oven: For cast-iron Dutch ovens, use hot water and a stiff brush to remove food residue.
Enameled Dutch ovens can be washed with mild detergent, but avoid abrasive cleaners that could damage the surface.
2. Seasoning: Regularly season your cast-iron model to prevent rust and maintain its nonstick properties.
This is especially important when you rely on your Dutch oven for cooking during emergency situations.
3. Dry thoroughly: Make sure to dry your Dutch oven completely before storing it.
This helps prevent moisture retention, which could lead to rust, especially when you’re in a survival scenario.
4. Check knob material: Always confirm that the lid’s knob is oven-safe.
Plastic knobs can melt at high temperatures, which could compromise the functionality of your cooking equipment when you need it most.